The form capture is used to get submissions from existing forms that weren’t created using the Customer Insights – Journeys form editor. Form capture is recommended if your existing form also sends submissions to systems other than Dynamics 365 or if the existing form contains complex logic that can’t be easily recreated in the Customer Insights – Journeys form editor. If the existing form can be recreated using Customer Insights – Journeys form editor, it’s not recommended to use the form capture feature.
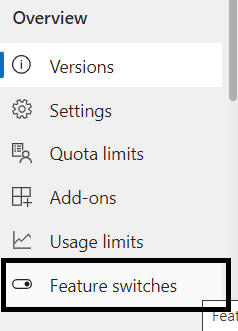
First, ensure you are using the latest version. Then, navigate to the settings area, find the feature switches, and enable the form capture option. Note that at the time of writing, this feature is in preview and has its own feature switch. This may not be necessary if you implement it at a later time.
To enable and configure the form capture feature in Dynamics 365’s real-time marketing module, you can follow these steps:
- Ensure you’re using the latest version: Before proceeding, confirm that your Dynamics 365 instance is updated to the latest version.
- Navigate to settings: Go to the settings area within Dynamics 365.
- Enable the feature: Locate the feature switches section and turn on the form capture option. Note that this feature is currently in preview, so it has its own dedicated feature switch. This setup might change in future versions of the software.


Create your marketing form
You can find information on Dynamics 365 real-time marketing forms on the official Microsoft website. Here is a link to the relevant documentation: Dynamics 365 Marketing – Real-time marketing forms.
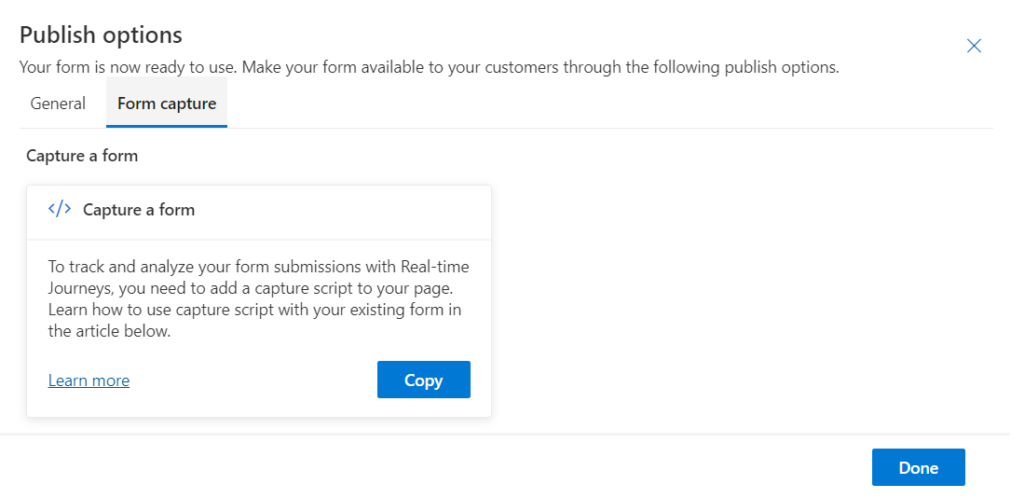
After creating the form, publish it. Then, select the Form Capture option. Click the Copy button to obtain your script.

Paste the script in to something like visual studio code or notepad where you will be able to edit it. Your script will include a link to this Microsoft documentation page: Capture forms in Customer Insights – Journeys – Dynamics 365 Customer Insights
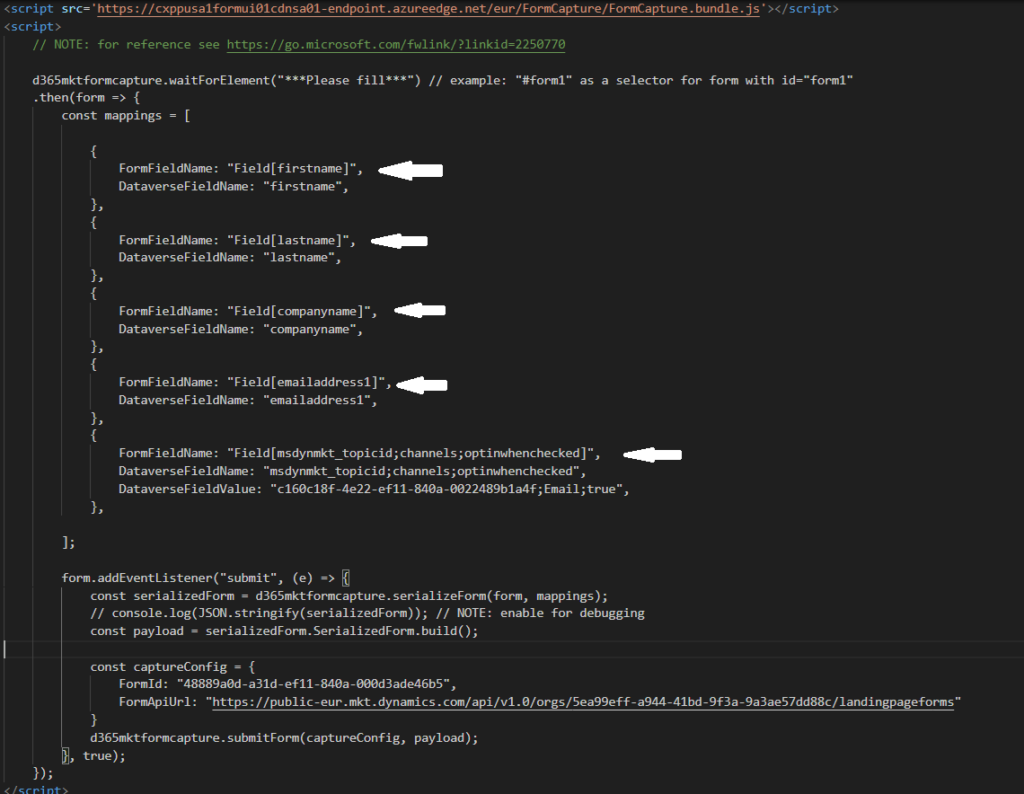
The code will start with a script at the top, followed by several sections marked with ***Please fill***. Replace these placeholders with values from your external form. Ensure the form has a set value so it can be identified on the page, and map each form field value to the corresponding D365 field name. All other provided information can remain unchanged.

Map Your External Form Fields With D365 Marketing Form Fields
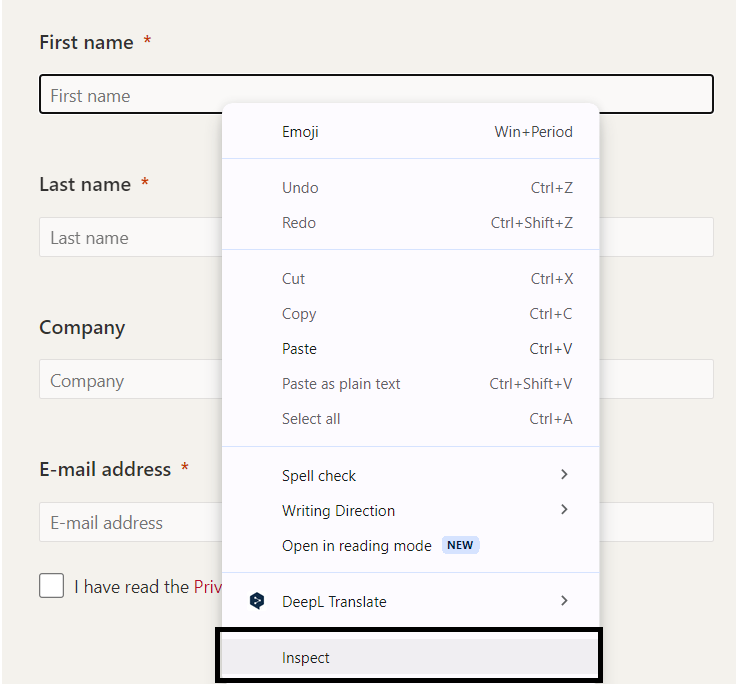
Next, retrieve the form field names from each field on your external form and add them to the Capture script. You can dot it by viewing the form on your website, click into the first field, right-click, and select Inspect.


Do the same for the rest of Form’s “FormFieldName” and replace them in the Capture Script with Field Name as shown below. Now you are mapping the form fields to the corresponding D365 Fields
The FormId at the bottom will be populated automatically in the script and maps to the correct form in D365, which should not be changed.

Send the form submission to Customer Insights – Journeys
Now take your entire modified script, and add it directly below where your form is on your web page. This likely will be after a closing form tag that looks like this </form>. Now refresh your form and fill it out. Wait a few moments and you should end up with a form submission on the form in D365. Here we can see all of the fields filled out and mapped in to the correct field on the Lead/Contact that was either created or updated.
Once you get a reference to the form, define the mappings, and serialize the form, you can add an event listener to the submit event and send it using the d365mktformcapture.submitForm(captureConfig, payload) function. This call returns a promise, and errors can be handled in the catch logic.
Important
If you have a custom validation in place or a Captcha check, make sure you submit the form to Customer Insights – Journeys only in case of a successful validation (for example, check for isDefaultPrevented on the submit event or explicitly call submitForm only after the validation passes)
<form id="form1">
  <p>FirstName: <input type="text" name="firstName"/></p>
</form>

<script>
d365mktformcapture.waitForElement("#form1").then(form => {
  const mappings = [
    {
      FormFieldName: "firstName",
      DataverseFieldName: "firstname",
    },
  ];

  form.addEventListener("submit", (e) => {
    const serializedForm = d365mktformcapture.serializeForm(form, mappings);
    // console.log(JSON.stringify(serializedForm)); // NOTE: enable for debugging
    const payload = serializedForm.SerializedForm.build();

    const captureConfig = {
      FormId: "...", // the form id on Dynamics 365 side
      FormApiUrl: "..." // the API url of the Dynamics 365 backend service where the form will be submitted to
    }
    d365mktformcapture.submitForm(captureConfig, payload)
    .catch(e => {
      // error handling
    });
  }, true);
});
</script>